

How To Decorate Handwritten Quilt Corners
The Write Stuff: Turn Handwriting into Stitches
It's like magic: you write on a tablet screen with a pencil-shaped stylus, and your machine stitches your words onto fabric! What a slap-up way to personalize your quilts, whether you employ it to add a subtle signature to your quilting or to personalize a project with someone's name.
First Things
Hither are a few things to call back about and call back:
- Practice with your stylus kickoff. It'southward a lot similar writing with a pencil, only different. (How's that for sitting on the debate?) Spend some time but doodling, with no demand to "go it right."
- Write in cursive, connecting one letter to the next. You lot'll be able to do some editing, but basically every time you lift the stylus yous're creating a tie-off, movement the machine, tie off again situation.
- Size isn't too important. You'll be able to resize at will inside THE Dream Motion™ PRO software
. - If y'all desire the effect to look like your usual signature, write just a bit more than slowly than usual simply don't retrieve also much nearly the messages. On the other mitt, if you want a "perfect" look to your words, imagine yourself drawing a film of each letter as you become, rather than writing a whole give-and-take at a time.
- Simple drawings work, likewise!
Write On!
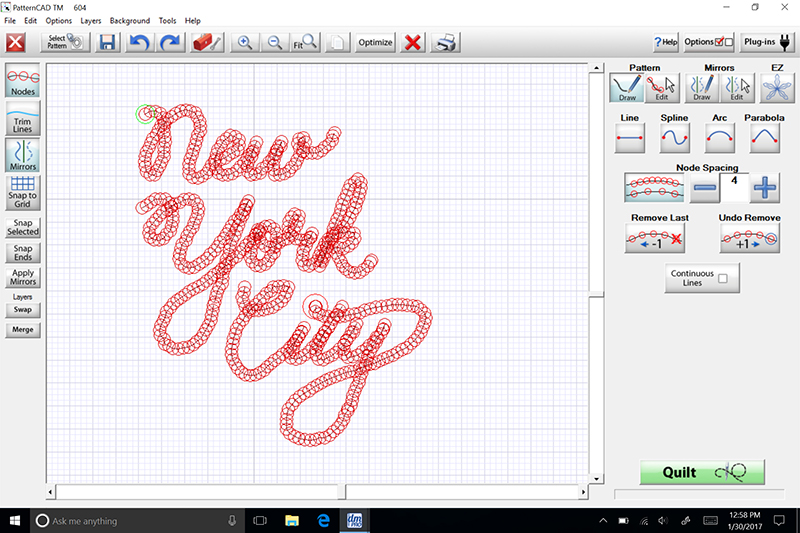
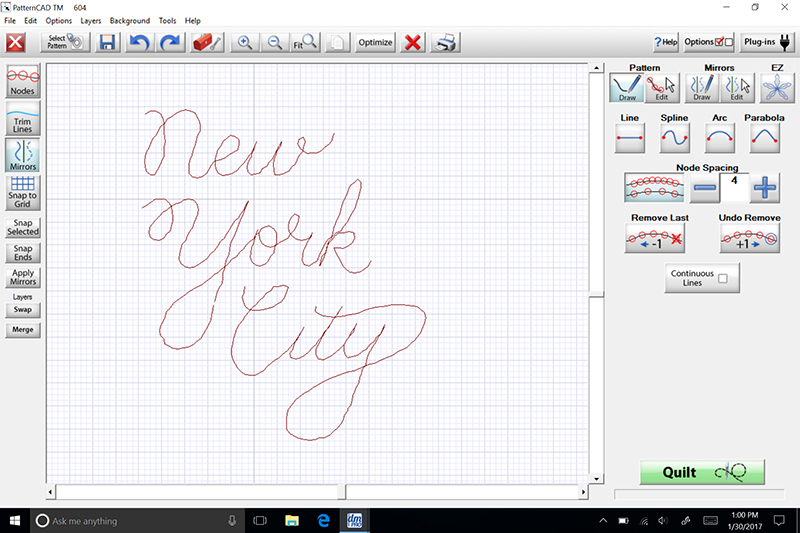
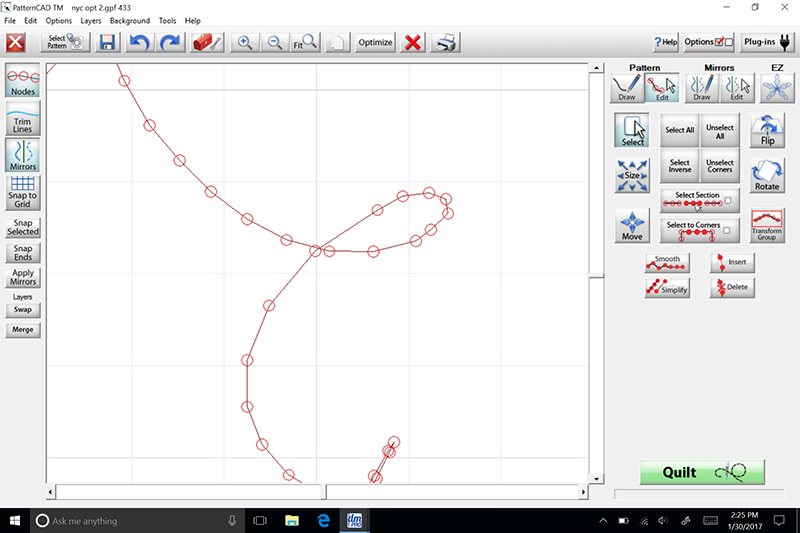
Let'south brainstorm. For this sample I'm going to digitize the words New York Metropolis to use on a projection.
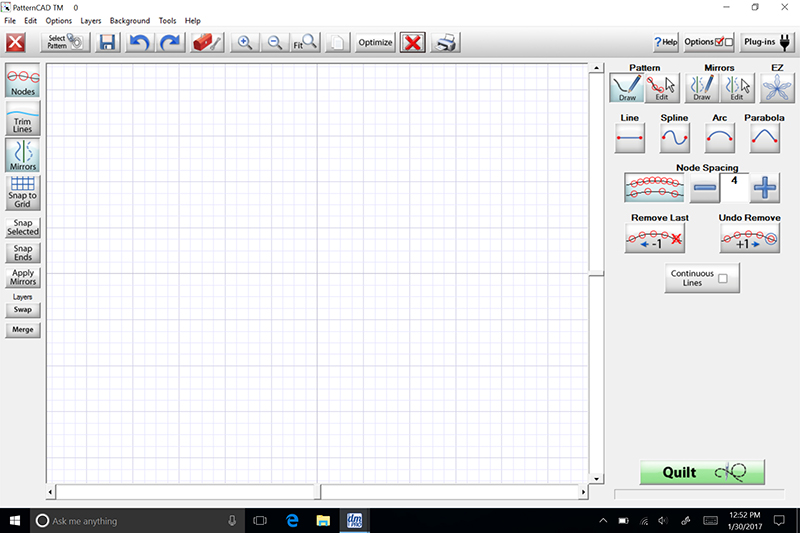
- Open THE Dream Motion™ PRO software and select the PatternCAD characteristic. Be certain the Draw icon under Pattern is selected. The default Node Spacing of four works well, producing plenty of editing points for our handwritten design. Be sure that Continuous Lines is NOT checked.
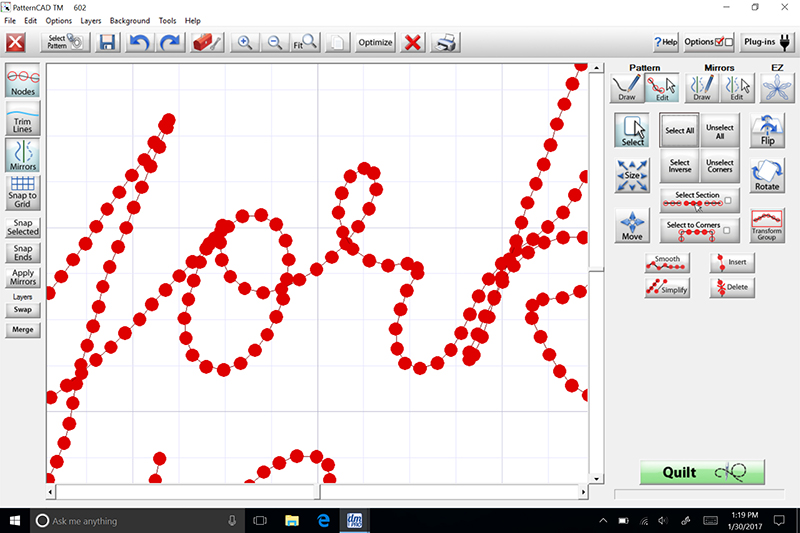
- Write New York Urban center on the screen, using a stylus or your finger. The grid is handy for keeping your letters even. If you run out of space, apply the sliders on the right and lesser edges of the workspace to move to a different surface area of your virtual paper. Make loops that you want to retain wide and open, and hesitate just a moment at abrupt angles to exist sure the plan doesn't miss the turn.
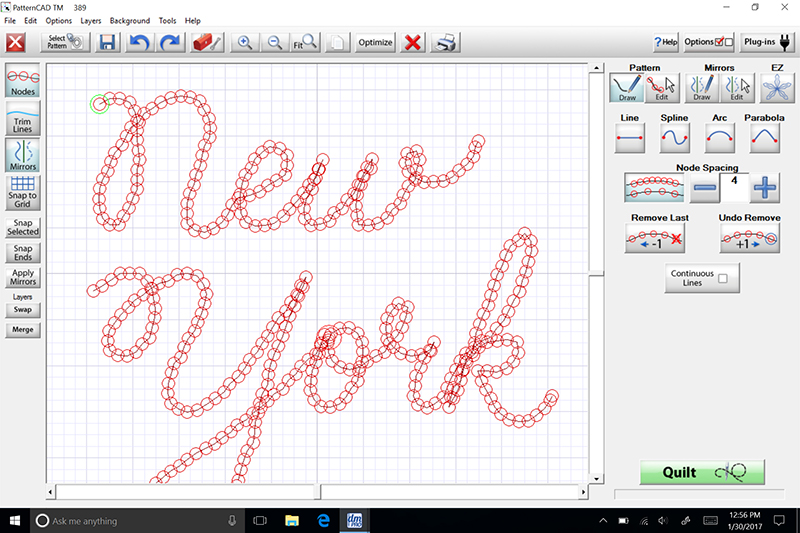
Note Y'all may want to piece of work some compromises into your writing. For case, I've used the tail of the y in Urban center to both cantankerous the t and dot the eye, providing a smoother stitch path without trims.
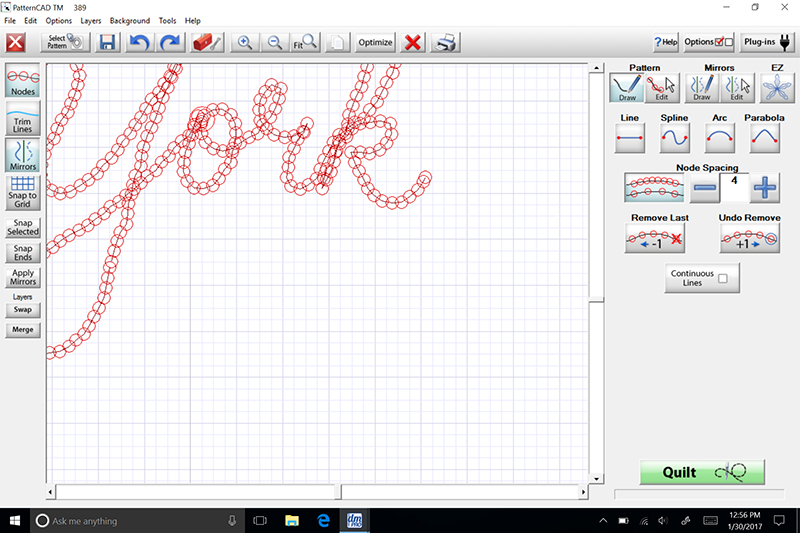
- When you're finished, use the Zoom Out icon to see the entire phrase. Next, click the Nodes icon on the left edge of the screen to temporarily remove those red circles, revealing the lines that volition stitch. You'll probably come across a lot of jitter in your lines, but that's okay. Turn the Nodes back on to become prepare for the next steps.
Familiar Tools
Some of the tools in THE Dream Motility™ PRO software are familiar from other programs. They may be in a different location on screen or operate a trivial differently, so be sure to endeavour them within this software.
- Zoom In, Zoom Out, and Fit: Utilize these icons on the pinnacle toolbar to enlarge areas of your design so that you lot can select and edit individual nodes.
- Undo and Redo: Represented by blue arrows, these are as well located in the acme toolbar, and they'll become your best friends! If you've just executed a big command, such equally smoothing an entire design, the Undo procedure may take a moment to complete. Watch the screen for changes and you'll know when to proceed.
- Save: The familiar floppy-disk icon; use it ofttimes.
Edit for Success
Depending on exactly how your handwriting looks, you'll apply some or all of these program features to edit your raw epitome for fabulous stitching. Follow along with the step-by-footstep instructions below, or experiment with these and other commands, possibly applying them repeatedly or in a different guild, to make your pattern exactly what y'all want information technology to be.
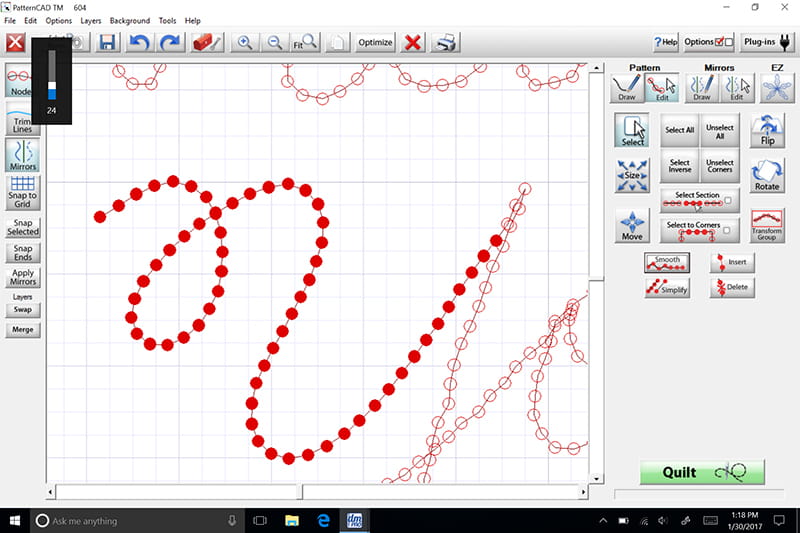
- Under Design, click the Edit icon. To select a node, drag a rectangle around it; larger rectangles will select multiple nodes. To unselect a node, drag another rectangle effectually it or click the Unselect All icon.
- To join the ends of 2 lines (for case, where a letter ran out of the frame and had to exist continued after scrolling the workspace), select the nodes at the ends to exist joined.
 Click Snap Selected on the left border of the screen.
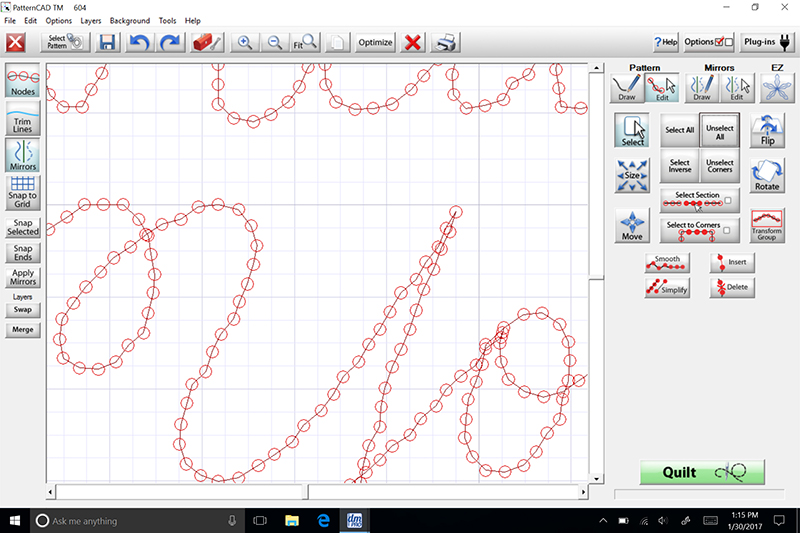
- To smooth the jitter out of your lines, select all of the nodes along a line; if you can't highlight all of the nodes with one dragging motility, just keep dragging new rectangles to select more nodes. The program will non unselect a node until you lot drag over it a second time, and then yous can add together more than nodes to those already selected. Click Smooth in the Edit menu along the right side of the screen. Yous can apply the Shine control more than once to reduce the jitter even more.

 It'south tempting to click Select All and Smooth the entire pattern at once, and that may work for y'all, but beware. Sharp points, such as the pinnacle of the r in York, volition be rounded by the Smooth command. Yous can experiment with Select All and then dragging to unselect the nodes effectually points and angles; the Undo icon is always available if you're not happy with the effect.
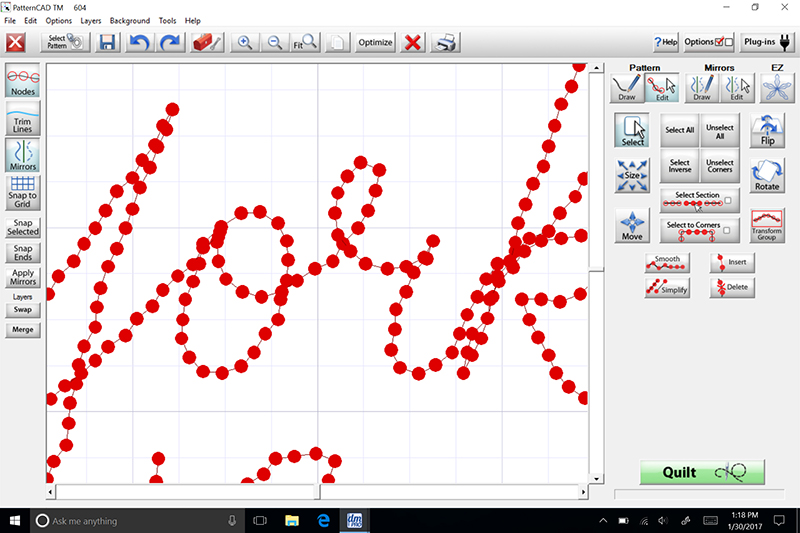
- Save your work past clicking the floppy deejay at the pinnacle of the screen. Fifty-fifty if yous're not finished tweaking the design, it's a good thought to save it occasionally just in case the ability goes off or yous make up one's mind, several steps later, that you actually preferred the design the mode it was. I usually add a number to the blueprint proper noun (NYC1, NYC2, etc.) and then that I can relieve a lot of different versions. They can always be deleted when you accept a finished blueprint.
Forwards and Reverse
Here's a neat matter to think when you're writing with stitches: the automobile can write astern too as forward. To utilize this to our advantage, click Optimize on the top toolbar. 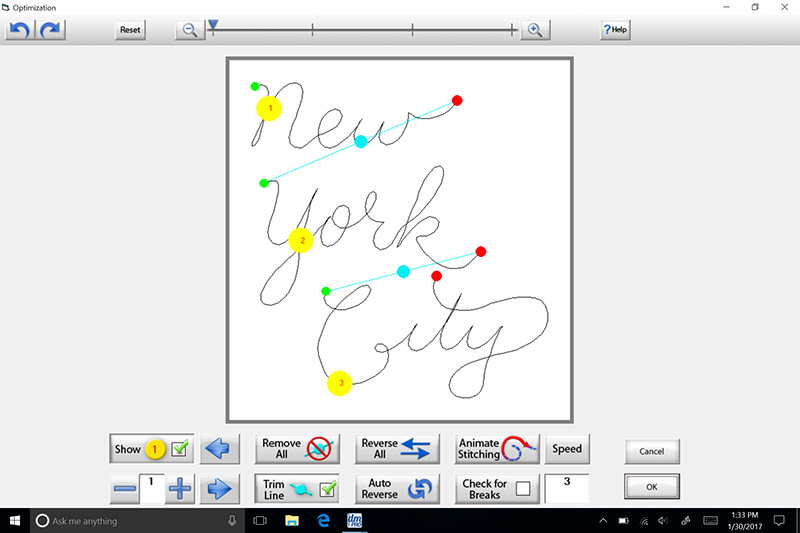 On this screen, every blue line represents a trim. Those dull downwards the stitching, and in this case we can eliminate both of them with a trivial editing.
- Tap on the greenish dot of the Northward and then tap the red dot of the due west. The 2 colors will change places (you may need to click off the design to see the change) indicating that the word will at present stitch astern, beginning with the west. Repeat with the green and ruby dots on the word City. (If you're using a mouse, but hover over one of the words until it turns into a yellow outline and and so click the green dot to opposite the stitching direction.)
- If necessary, click on the numbered yellow dots to ensure the words will stitch in lodge: New, York, and so Metropolis. Yous'll now see two short bluish trims connecting the ends of the words.

- Click Remove All and and then No. See how at that place's just one numbered yellow dot now? You've created a design that volition stitch without stops, tie-offs, and trims! But it'southward not quite finished.

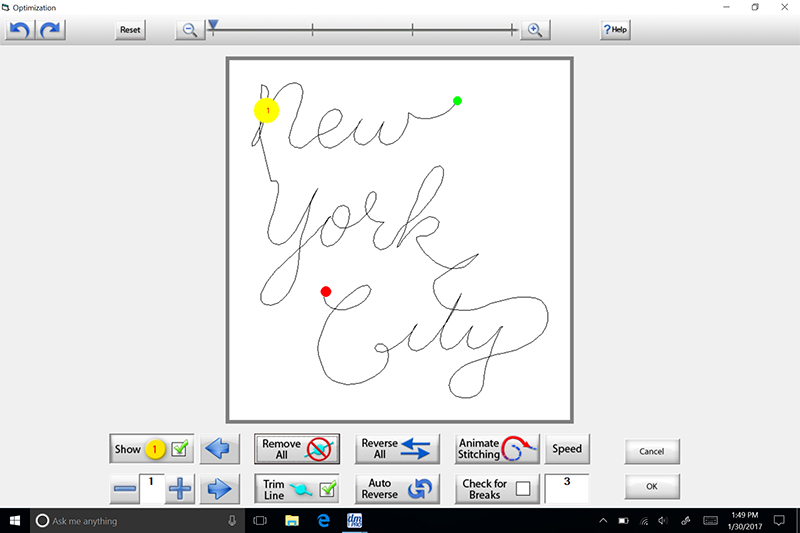
- Save your design with a new number at the finish. Click OK to return the optimized design to the editing screen. Scroll and zoom to focus on the newly created line connecting the grand to the tail of the y in City and zoom in shut.
- Select the node in the center of the new line and click Insert in the bill of fare on the right. This volition add together a new node to the line, which is too straight to be attractive. Repeat the process to add several nodes to the line.

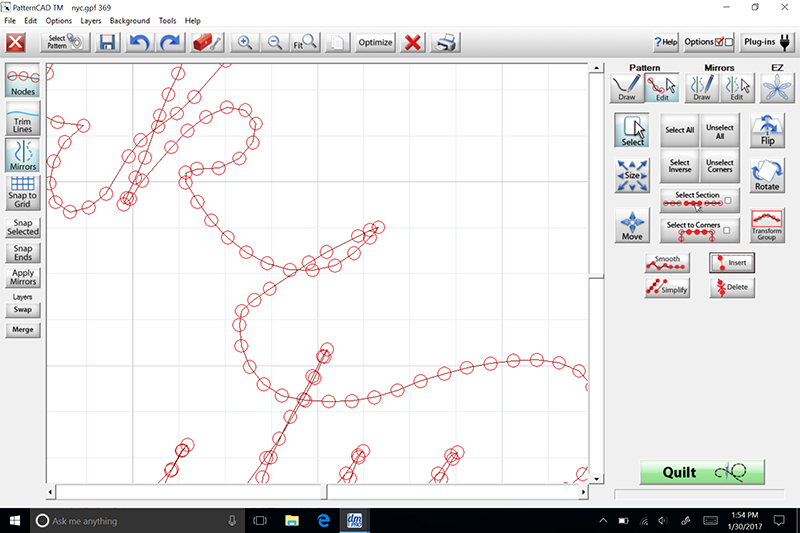
- Select and motion the new nodes to create a more curved, looping line connecting the two words. Next, select all of the nodes along the new curve and click Shine. Only like that, the words are connected past a lovely swooping curve! Repeat to smooth out the new line connecting the N and the Y to cease your pattern.
- Save your blueprint. I ordinarily either put "final" at the stop of the name or just save it without a number, indicating that this is the design I desire to use.
Sew together Away
When you've completed the edits to your blueprint and saved it, your handwritten design is available to utilise with whatsoever of the program's tools. You can brand it any size you lot like, foursquare it off or skew it to fit a wonky block, or even stitch information technology over and over to cover the entire quilt surface. Use a thread that blends into your projection to create a subtle signature, or stitch with contrasting thread to let the whole world read what's on your mind as y'all quilt.One more suggestion: set the stitch length to 11 or 12 stitches per inch. With fewer stitches per inch, your handwriting is more than probable to appear jagged. In a higher place all, play with the many features and settings in your THE Dream Move™ PRO software. You'll find so many exciting possibilities!
Source: https://www.brother-usa.com/blogs/stitching-sewcial/the-write-stuff-turn-handwriting-into-stitches
Posted by: souzasaime1973.blogspot.com
0 Response to "How To Decorate Handwritten Quilt Corners"
Post a Comment